
Astrophotography in the city
Light pollution can be a nightmare for astrophotography. Anyone wanting to get the best results out of their night session would go to a place with dark skies like Wales or Exmoor. There is, however, lots of things anyone can enjoy in the night sky with just an entry-level camera, right from the heart of a big polluted city like Bristol. It is possible and you won’t believe the results. 🙂
Lesson learned from the 2020 lock-down
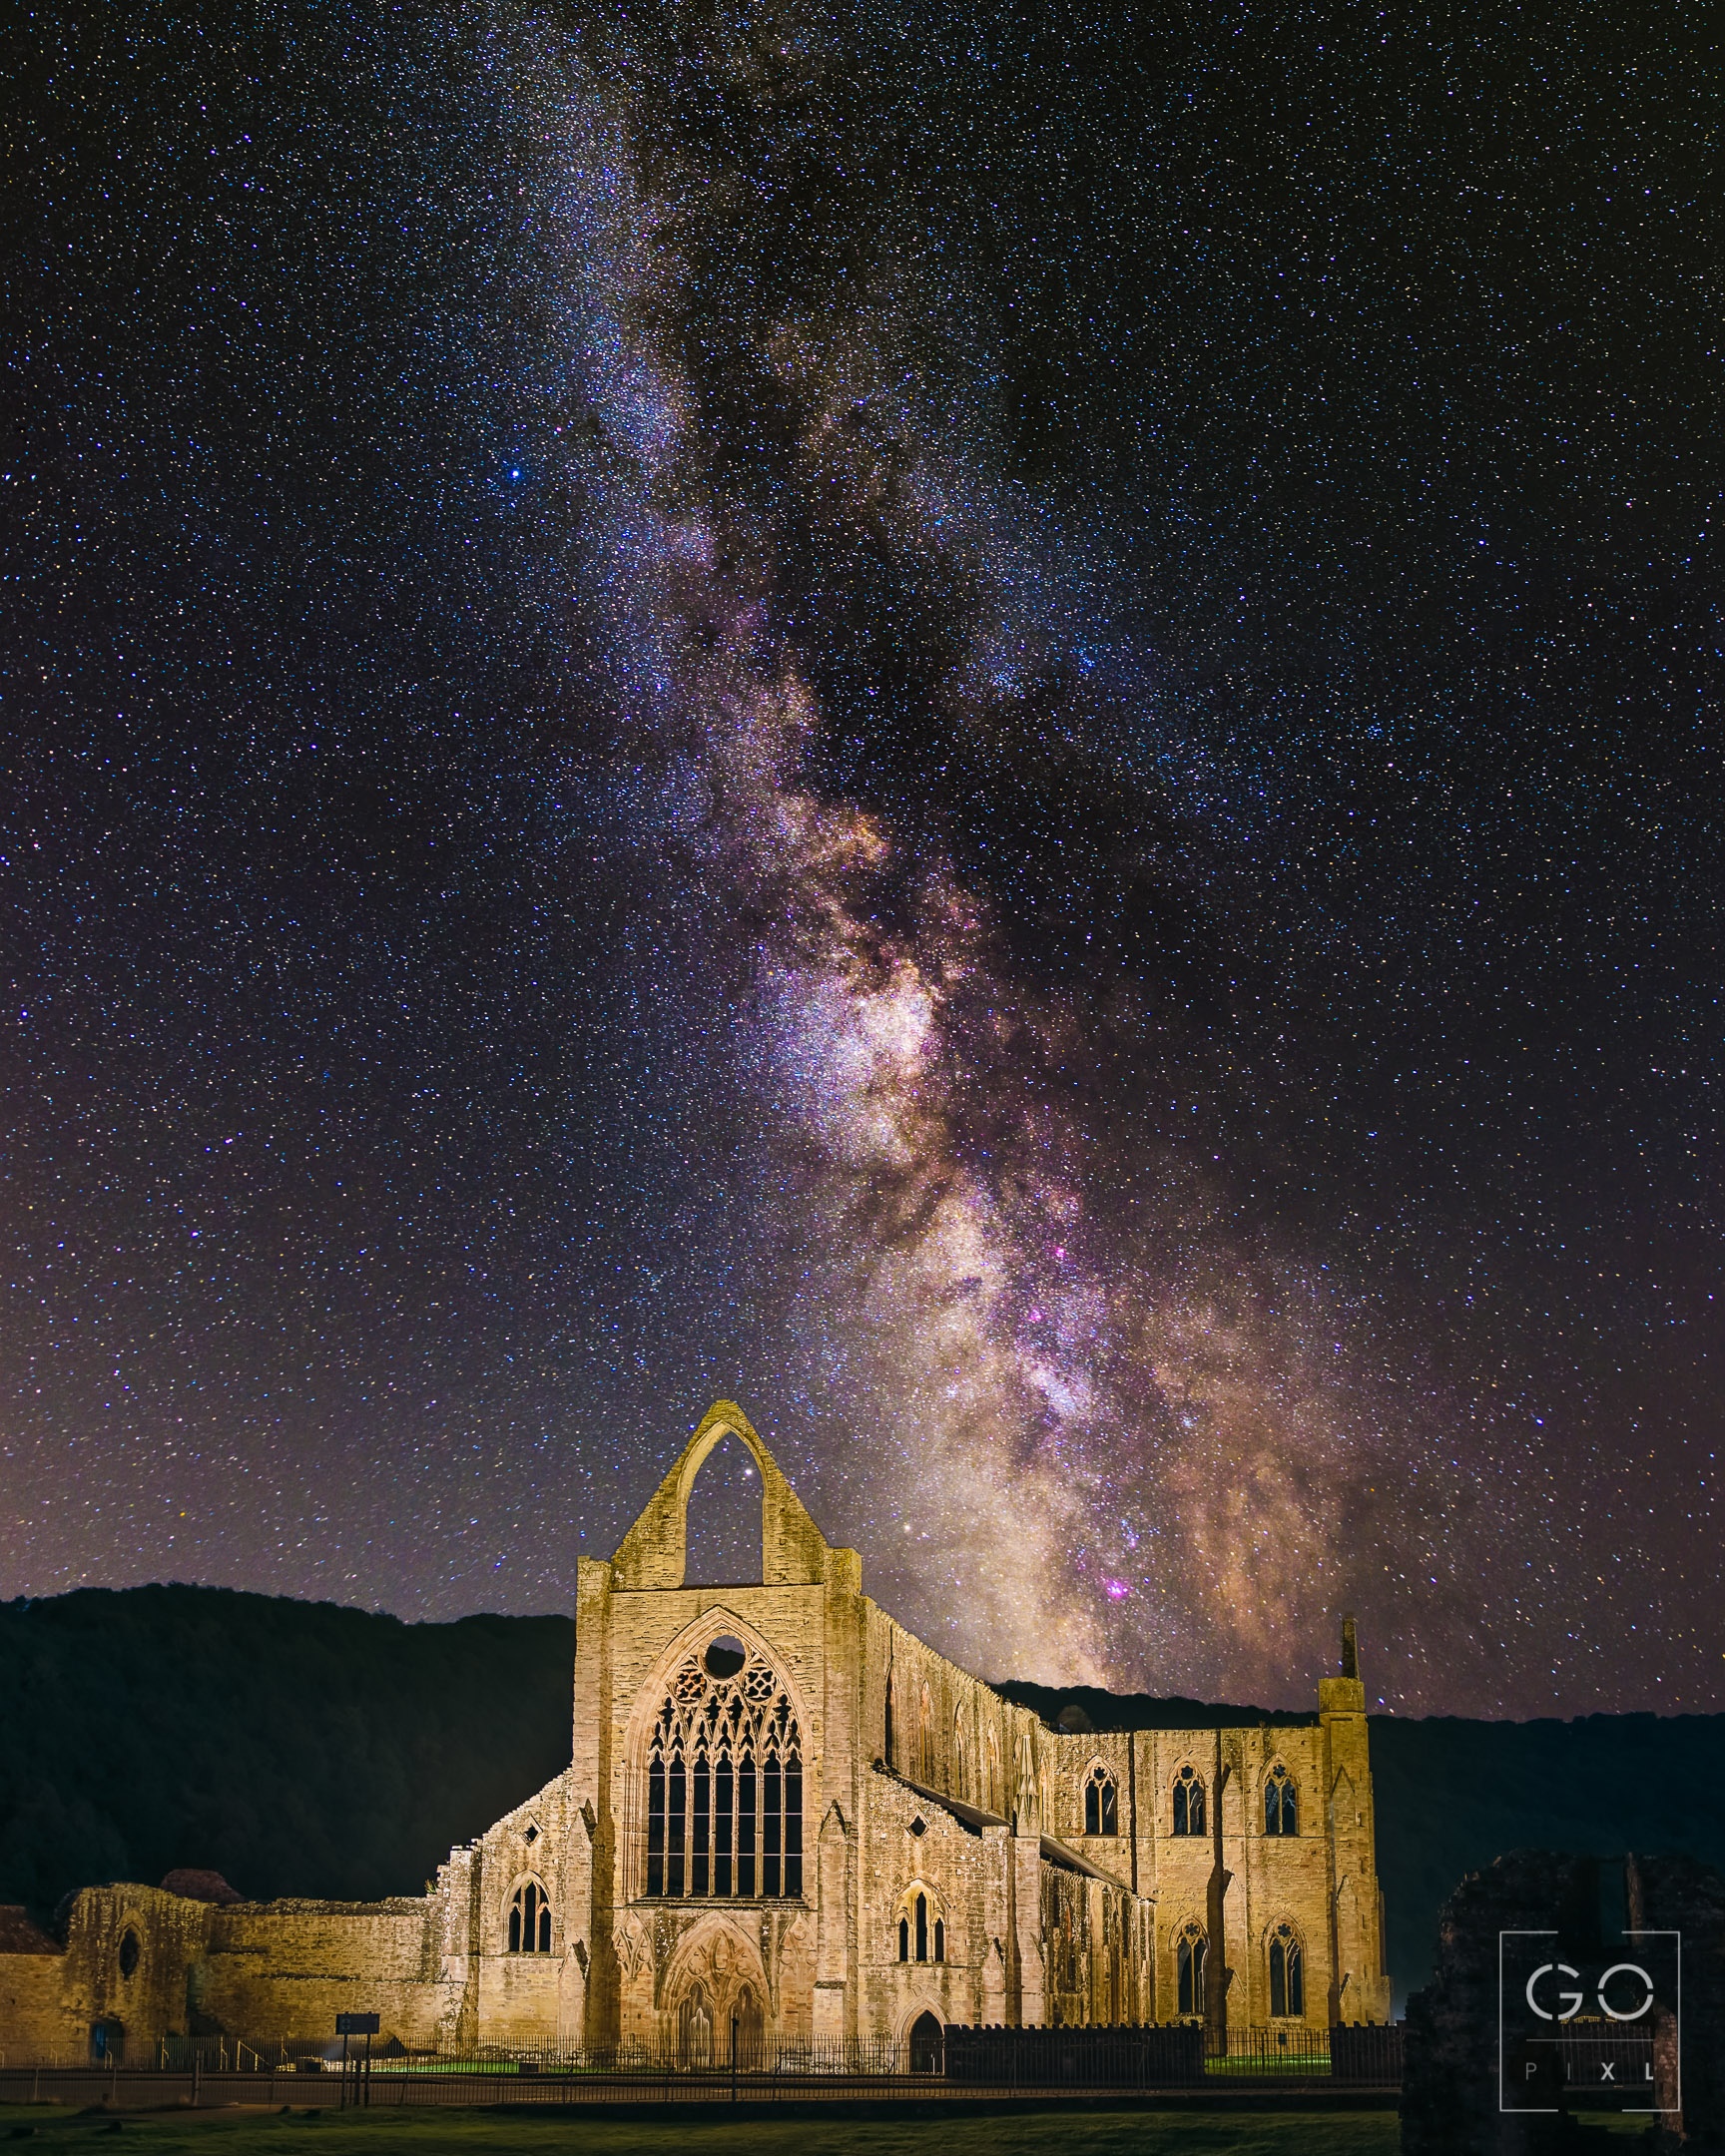
As I just said, anytime I want to do an astrophotography session, I usually drive to my favourite place of all which offers extremely dark skies: Wales. The night there is extremely dark and the sky just looks amazing when there is no light pollution! The Milky Way is simply jaw-dropping:
With the COVID-19 lock-down however, travelling is no longer an option. We are limited to what we can see from our window, balcony or back-garden. I’m lucky enough to have a balcony but I thought there was no point trying to shoot the night sky from Bristol city centre. With the lock-down not coming to an end anytime soon and extremely good weather, I finally gave it a shot. I was amazed by how much I was able to do with very little equipment. This has really changed my view about astrophotography in the city so I thought I would share my experience so you could learn from it and maybe enjoy the night sky for yourself. I promise you you won’t be disappointed. All images from this point on have been taken in Bristol which is among the most light-polluted areas in the country.
Before we begin though, I should mention that this post is not intended as a tutorial on how to shoot each subject but rather a way for me to show you that anyone can enjoy astrophotography in a light-polluted city.
Equipement
You don’t need much but let’s get that out of the way first.
A camera (any camera)
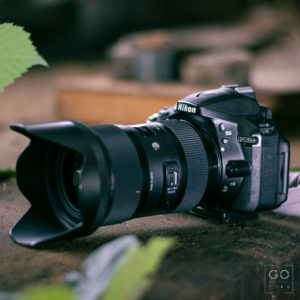
The primary piece of kit you would need is any camera with manual controls. I use a 7 year-old entry-level Nikon D5300. It’s nothing fancy but as you’ll see below, you can get great results with it. Having the latest full-frame or mirrorless camera makes things easier sometimes but by no means is it required. Any camera does the trick. Even smartphones with night mode can produce incredible images nowadays.
Support (the sturdier the better)
Astrophotography involves long exposure so keeping the camera still is essential. I recommend a good tripod but if you don’t have one, you can make do with setting your camera on a table, chair, or even on your camera bag and using the build-in self timer to avoid camera shake.
Lens
Any lens can work! A good starting point would be a wide-angle lens with a large aperture (low f/ number) but some subjects can work great with a standard kit lens. I will talk about specific lenses later when we come to the different subjects you can shoot. My go-to lens is the Sigma 18-35mm f/1.8 DC HSM: an incredibly sharp and fast lens. Perfect for astrophotography.
Optional equipment
There are lots of little things that are not essential but can make your life easier. Some are very cheap, some not so much, but I find them really helpful at times:
- Spare batteries: long exposures can really drain your batteries FAST. Having a spare or two can make your life a lot easier
- An intervalometer: Some subjects/techniques require to take pictures at regular interval (i.e. every 3 seconds for example). Some cameras have built-in intervalometers but an external one is easier to use and they only cost ~£10 on Amazon or at your local camera shop.
- Apps to explore the dark sky: It’s a lot easier to know what to look for outside when you can look for it in advance on your phone. I use a variety of apps for that: Stellarium (free), Star Walk 2 (free) and PhotoPills (not free) are amazing for astro and treasure-troves of information.
- A star-tracker: this is for advanced deep-sky astrophotography only. It is not needed for regular wide-angle shots and can be expensive (~£250) but I have included it here because it opens the door to a lot more opportunities to get exciting images.
What to shoot?
Now that equipment is out of the way, let’s talk about what you can do an a light-polluted area.
Let’s get it out there first: some subjects are literally out of the picture (unfortunately). No matter how hard you try, it’s impossible to get a good picture of the Milky Way within a light-polluted area. Similarly, some deep-sky objects like emission nebulae are very hard to get without expensive dedicated equipment (modified astronomy cameras, narrow-band filters, telescopes, etc.). But don’t worry, there are still lots of exciting stuff you can see and shoot. Let talk about that now.
I have ordered these subjects with the easy ones first, the one that don’t require specific gear other than the basics I mentioned above. As we go down the list, it gets a bit more tricky to get and it might require extra equipment.
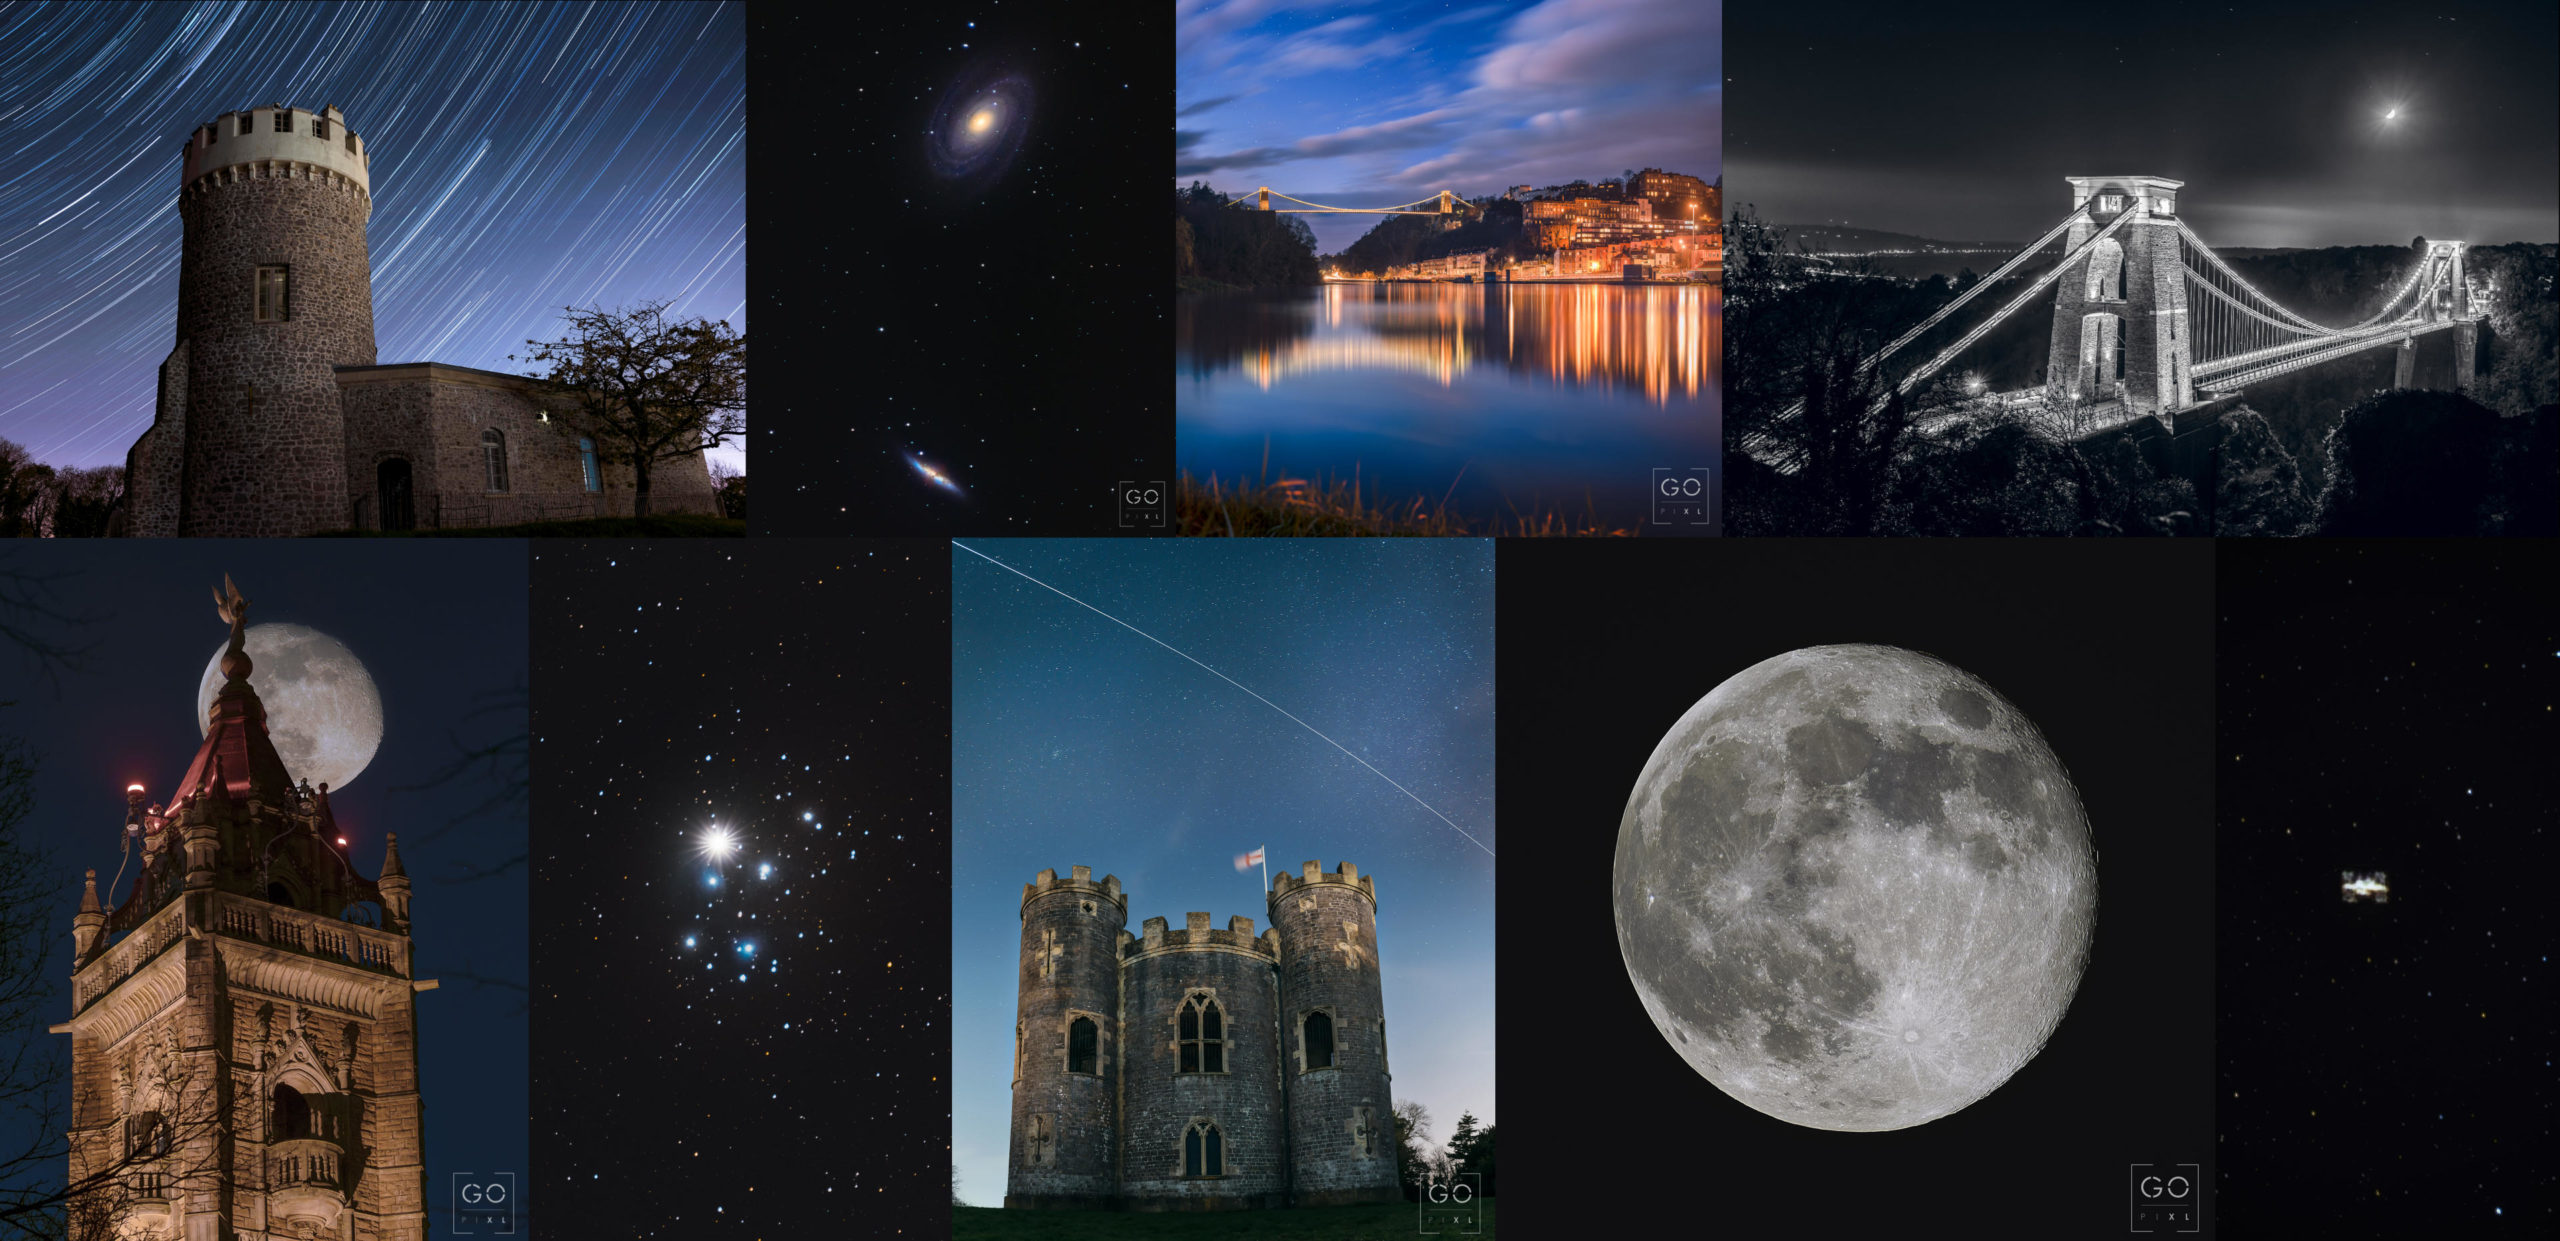
Starry nightscape
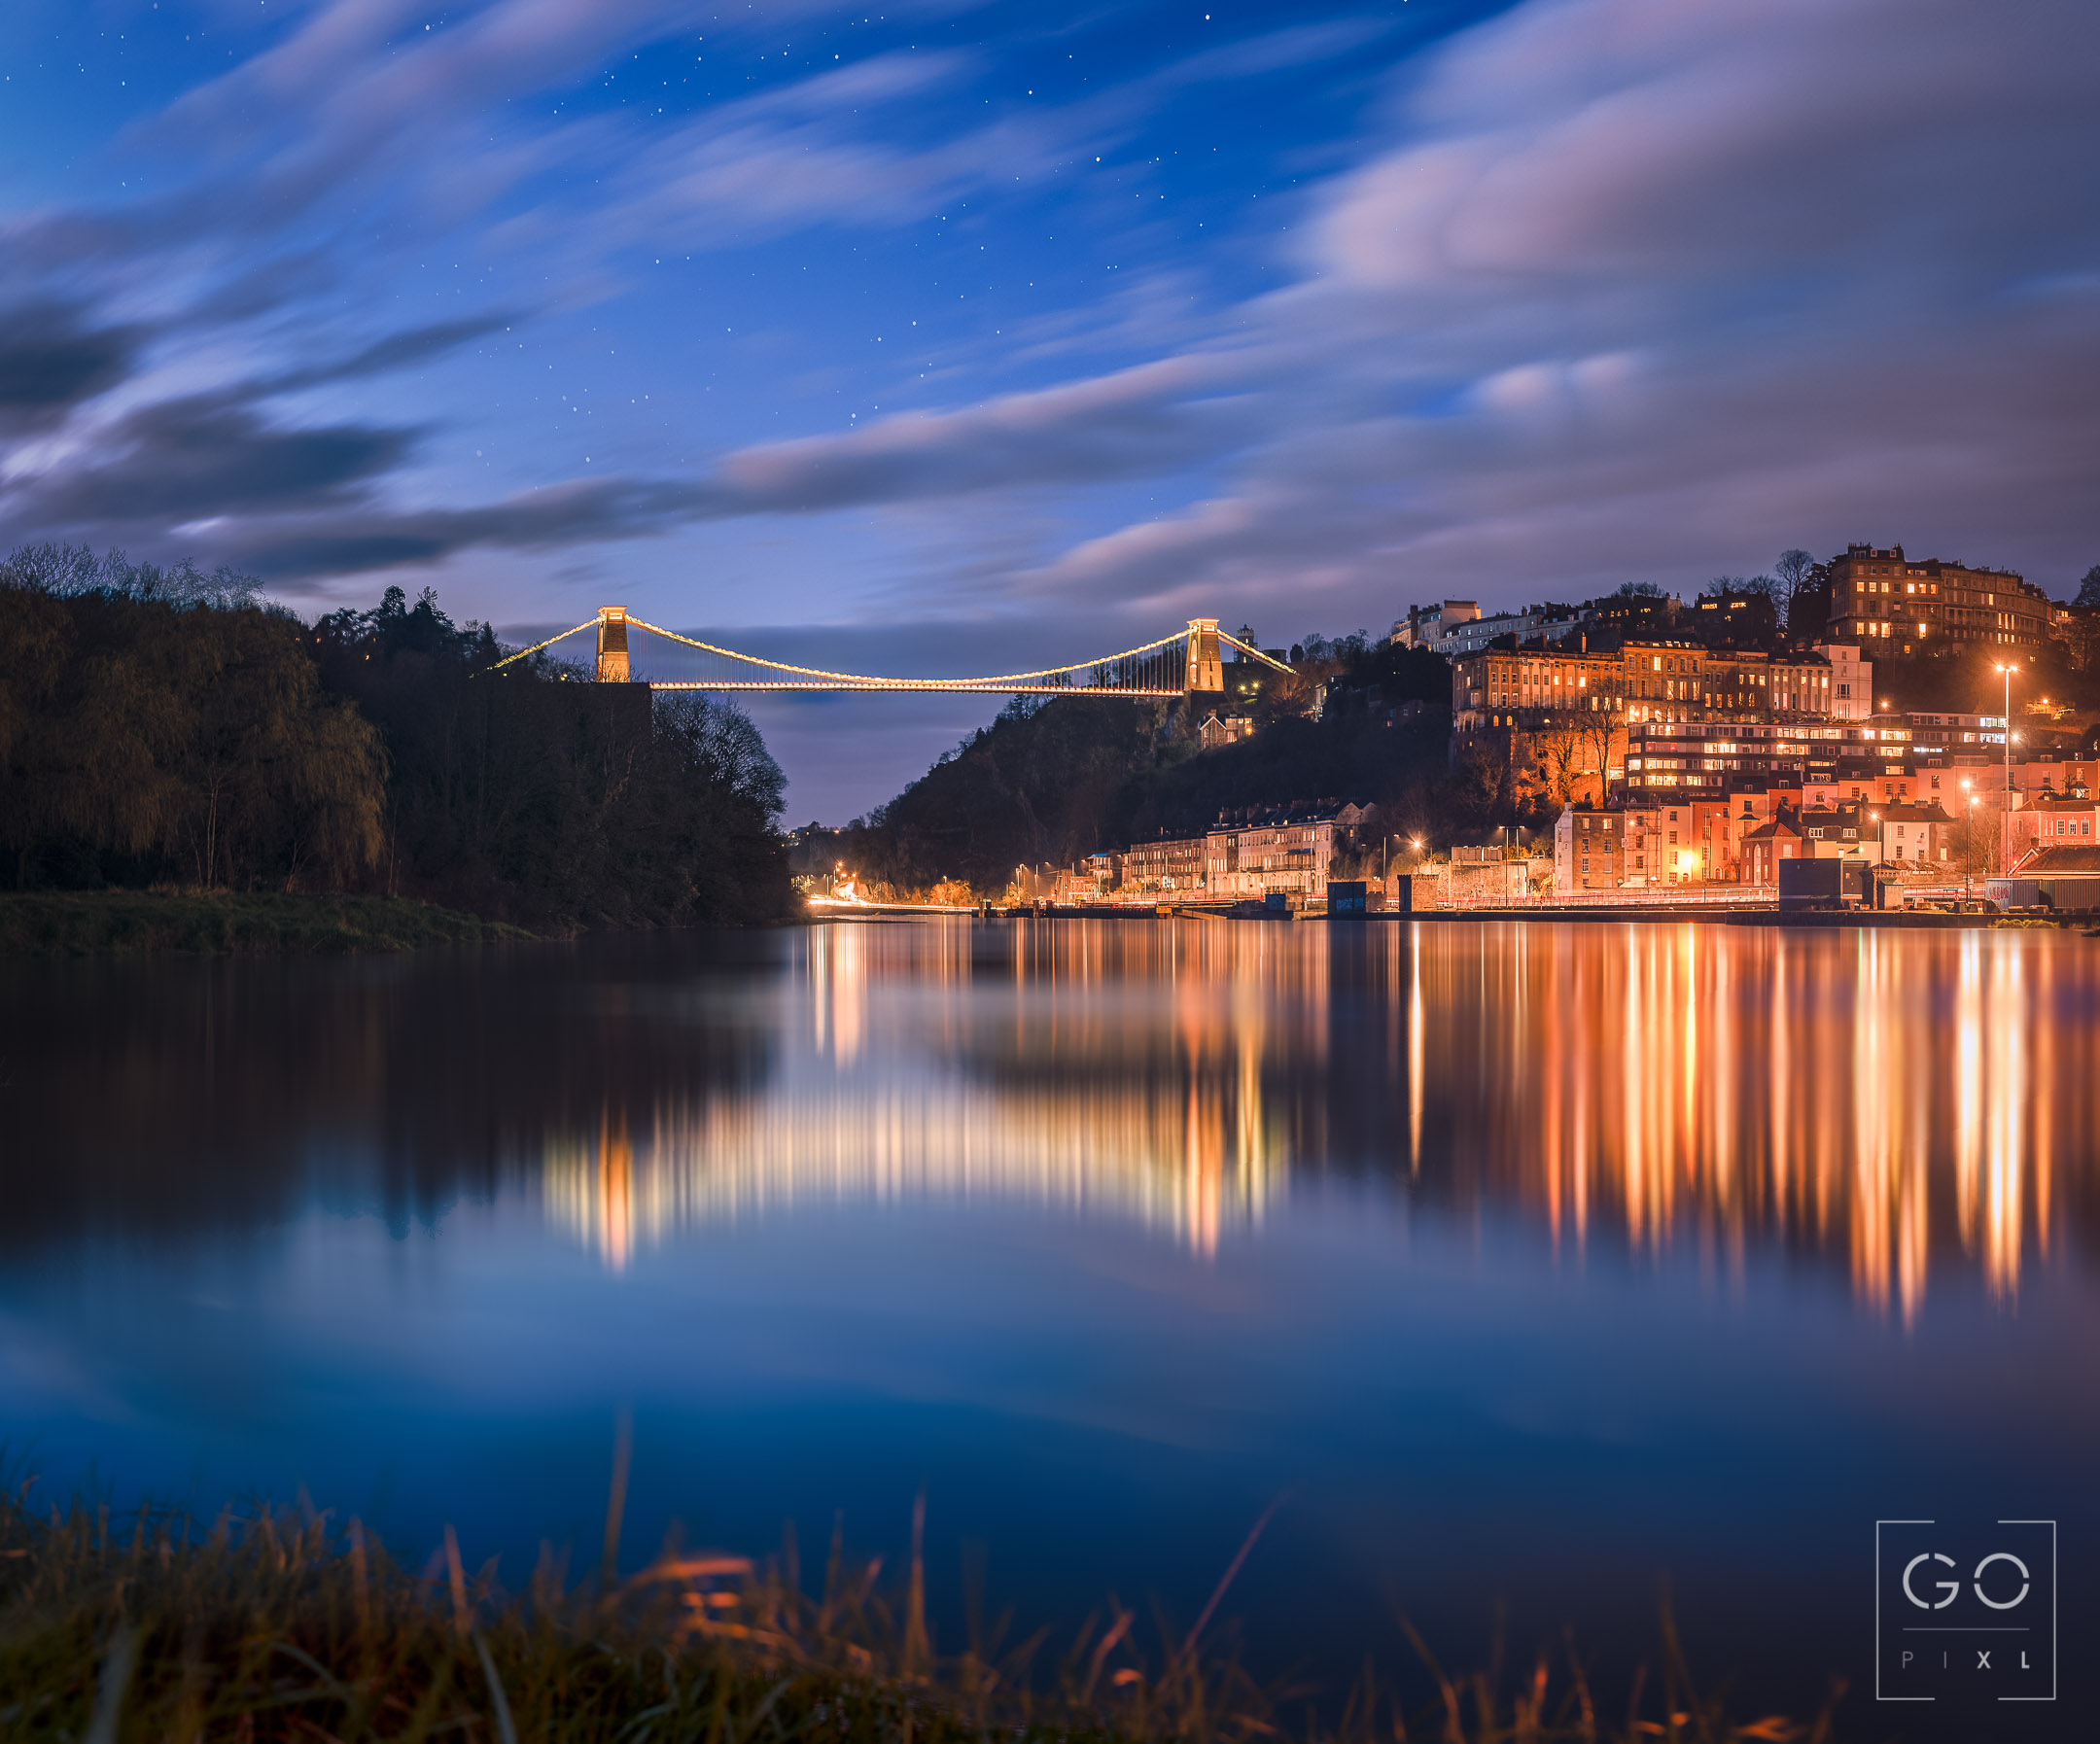
One of the simplest things to shoot at night is a regular city-scape where you incorporate the night sky. This is done preferably with a wide-angle lens and with a shutter speed that is faster than 25 seconds. You can start shooting as soon as the sky is dark enough to see some stars and I would recommend shooting at the end of the blue hours (roughly 1h after sunset) where the yellow street lights blend well with the blue night sky. Obviously the middle of the night works well too. It’s just down to personal preference.
Here is an example shot of the famous Clifton Suspension bridge during the blue hours. The stars are not the main subject of the photo by any means but it really adds to the picture in my opinion. This was shot at 35mm, f/5.6, 20 sec, ISO 100
Star trails
Next on the list of easy wide-angle astrophotography in the city is star trails. This is when lots of pictures of the night sky are taken at regular interval (i.e. a timelapse) for a long period of time. As the Earth is slowly rotating, the stars will appear like they are moving across the sky in a circle. I really like star trail images, especially when they include a nice foreground. They are technically easy to shot and an entry-level kit is more than enough for beautiful star trails.
To get a successful image, set your camera in manual mode, 30 sec exposure (or more if you have an external intervalometer with bulb mode), wide aperture (f/1.8 or as low as your lens can go), manual focus to infinity to get sharp stars, manual white balance. Take a test shot and adjust the ISO to get a good balance between foreground exposure and visible stars.
When satisfied with your settings, set your intervalometer to take pictures every 32 seconds (the 2 secondsgap is to allow the image to be written to the SD card before taking a new one) for as long as you want (or until you run out of patience, memory space or battery). Make sure your battery is full before starting because this type of shoot drains them fast. You can also use a powerbank to charge your camera if it supports USB charging (or use a dummy battery if not).
Once at home, process one of the RAW files in Lightroom (or your favourite program) to your liking, sync the edit across all files, export them as TIFFs and use a program like StarstaX (free) to combine those TIFF files into a single star-trail image.
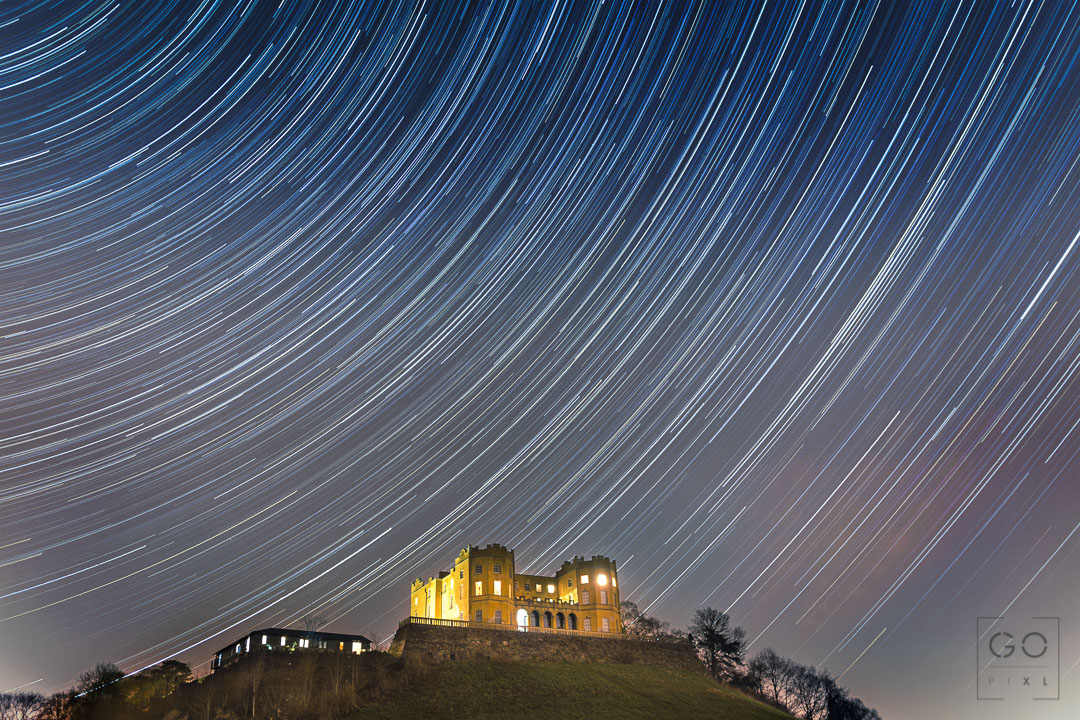
In the end, you can get images like these. The first one is Stoke Park Estate in Bristol (shot in March 2017) and the second one is the Clifton observatory.

International Station Station Flyover
Let’s move up one notch on the difficulty scale: shooting an ISS flyover. Well, technically it is not harder to shoot than any other astrophotography subject. It’s just that you will have to figure out your composition beforehand and nail the timing perfectly to catch the ISS as a flyover only lasts a few minutes and once you press the shutter, you cannot adjust anything until it’s too late and the ISS is long gone.
So arrive early at your location of choice (or if you are still in lockdown, go out in the back garden and figure out your composition based on where the ISS will pass. There is a number of ISS detector apps to help you with that. Once you have your composition, take a few tests shots to make sure your settings are correct. You can either shoot in bulb mode or in timelapse mode. Timelapse mode is a bit more forgiving on settings but there will be gaps in the trail that you will need to clone out in post.
Once the ISS shows up, start shooting and keep shooting until the ISS is gone. If you’ve shot in bulb mode, you should get a photo with a nice bright arc across the sky. And if you’ve shot in timelapse mode, you will have to combine several shots in post to get the full arc.
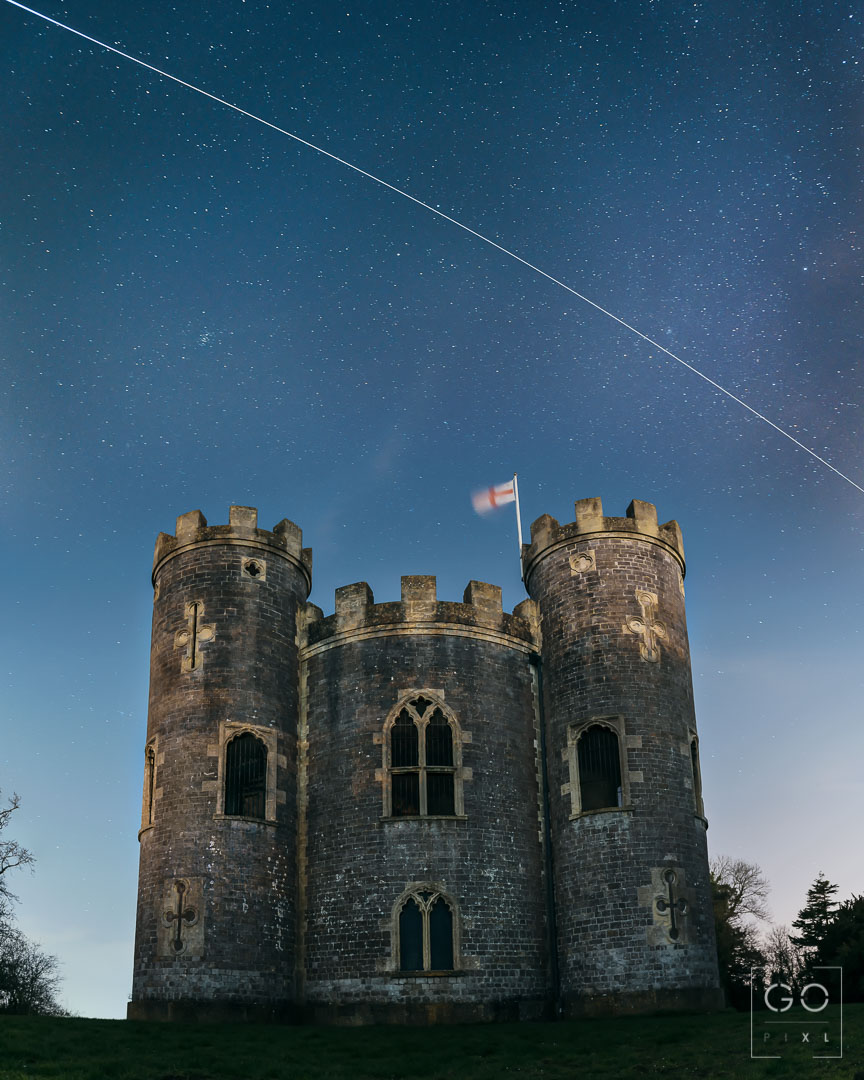
Once you’re done post-processing, your image should look something like this, which is a flyover of the ISS over Blaise Castle in Bristol in March 2019.
Similarly, there are other bright satellites you can image from the City: Iridium satellites or Starlink satellite trains make great targets.
The Moon
Maybe I should have started this list with the obvious astro subject we all know: the Moon!
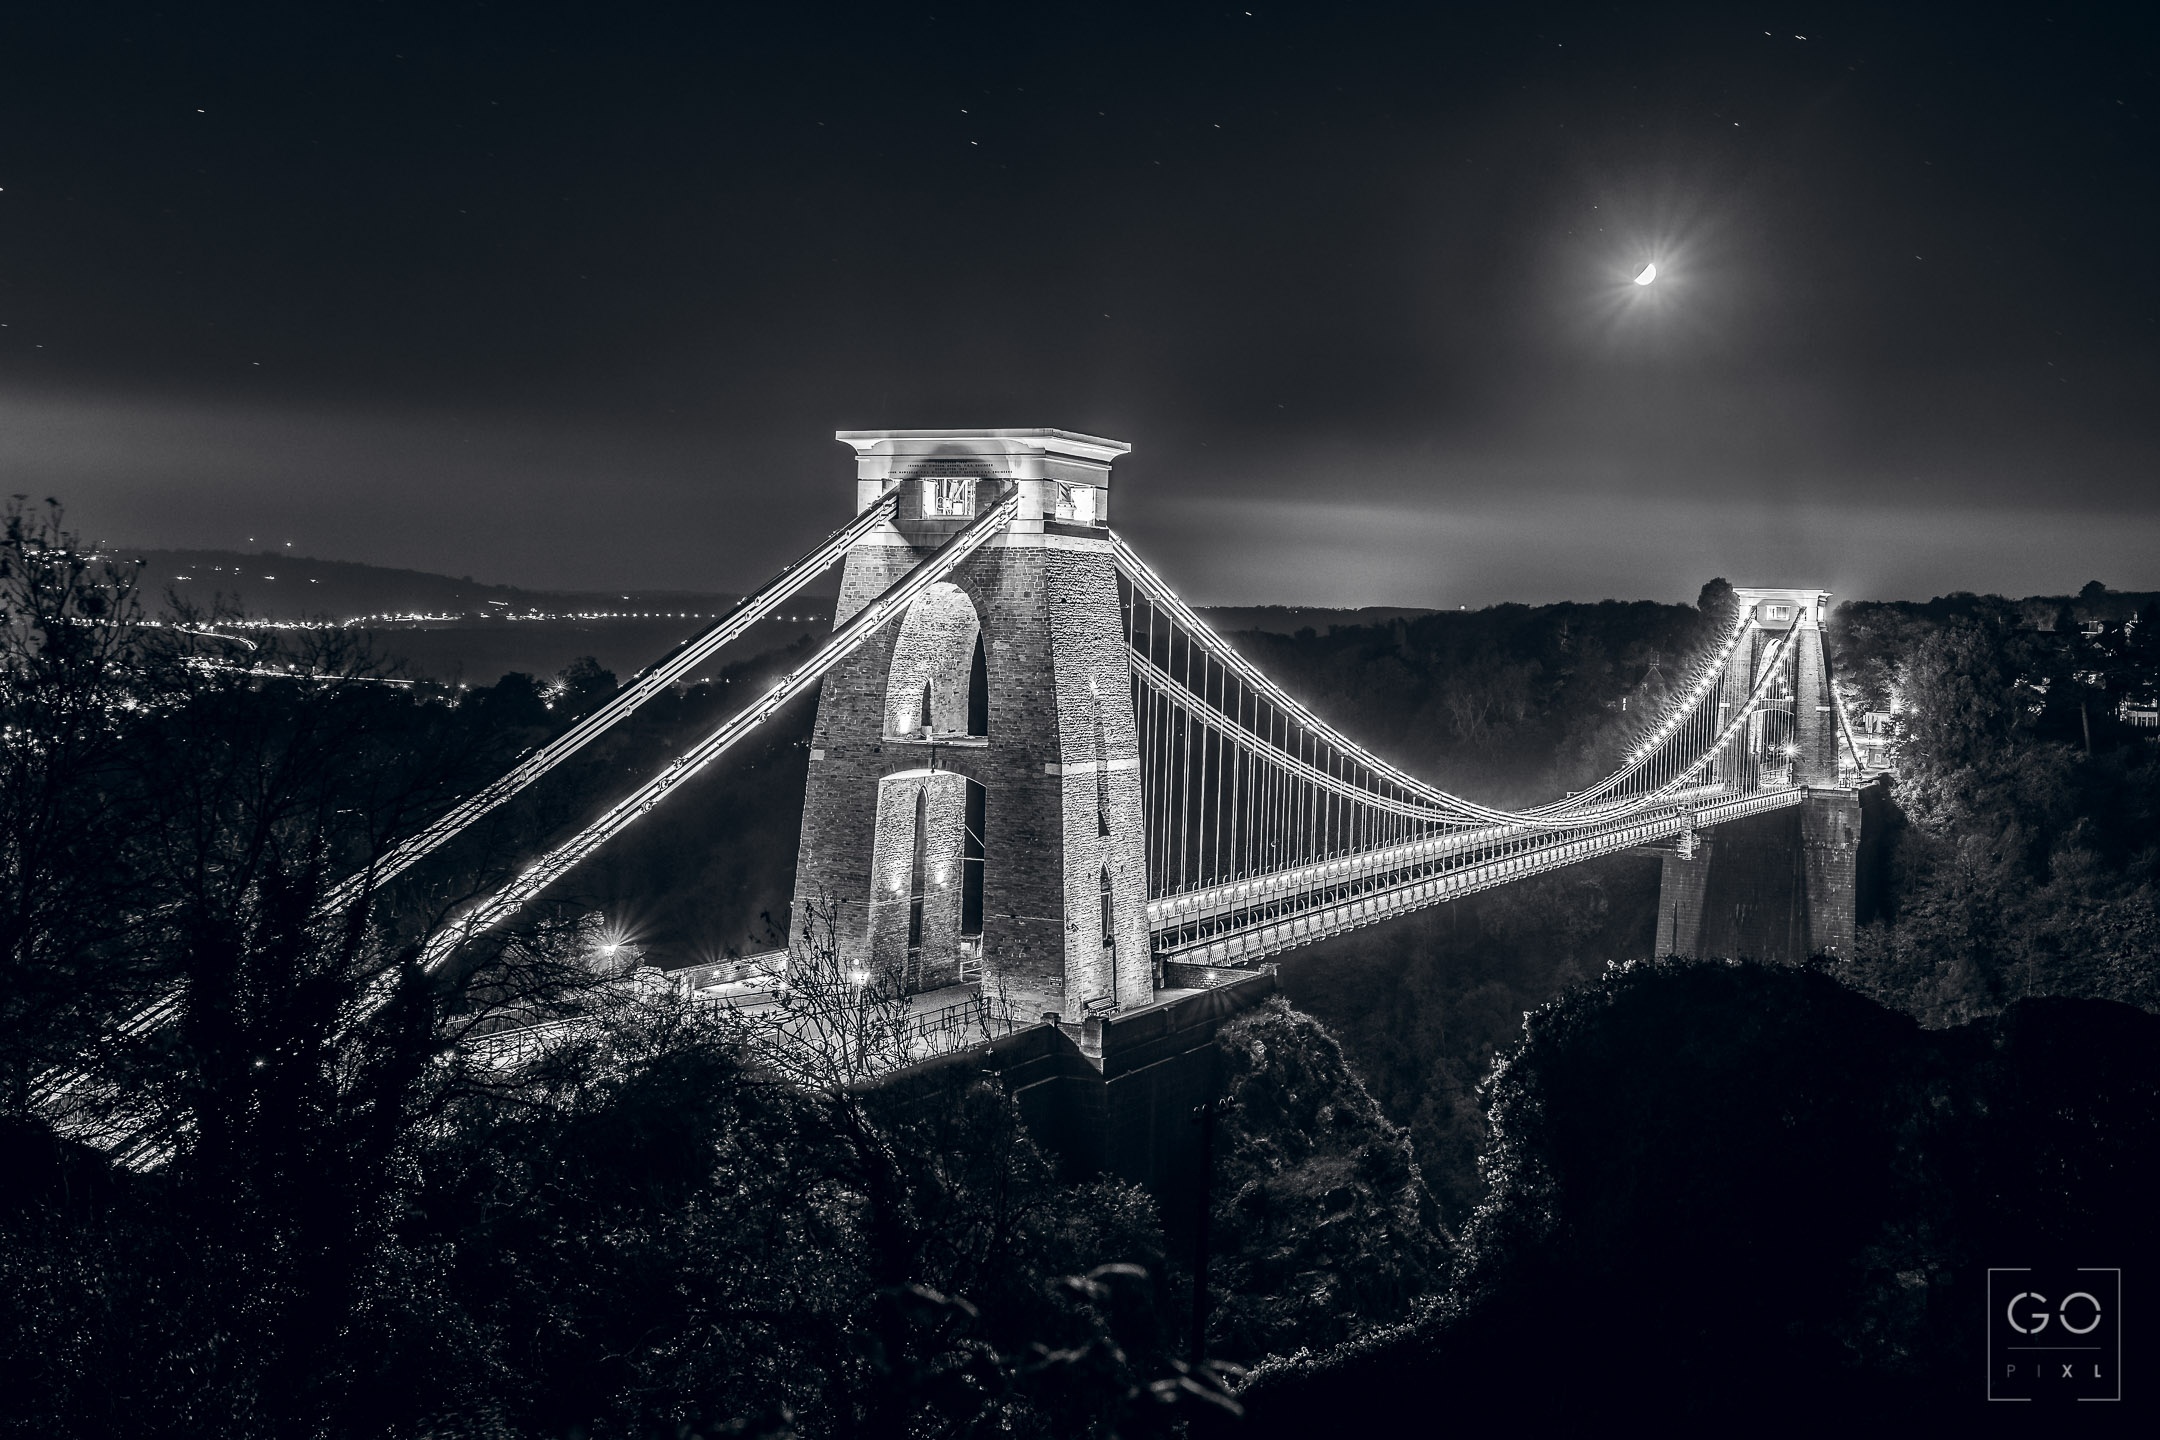
You can either incorporate the moon in a night time wide-angle shot of your main subject, like I did here with (again) the Clifton Suspension Bridge
You can go with a tighter composition and play with perspective to get the Moon behind a foreground subject (tower, building, trees, anything!). The longer the focal length, the bigger the Moon will appear compared to your foreground so you can take advantage of this to fit your vision. For example, I wanted to get a big Moon behind the Cabot Tower so I looked at PhotoPills to figure out when the Moon would pass behind the tower at an angle that would fit my composition and I got the shot. It’s worth mentioning that you might need to focus-stack two shots to get both the foreground and the Moon in focus (if it’s what you want), which is what I did here.

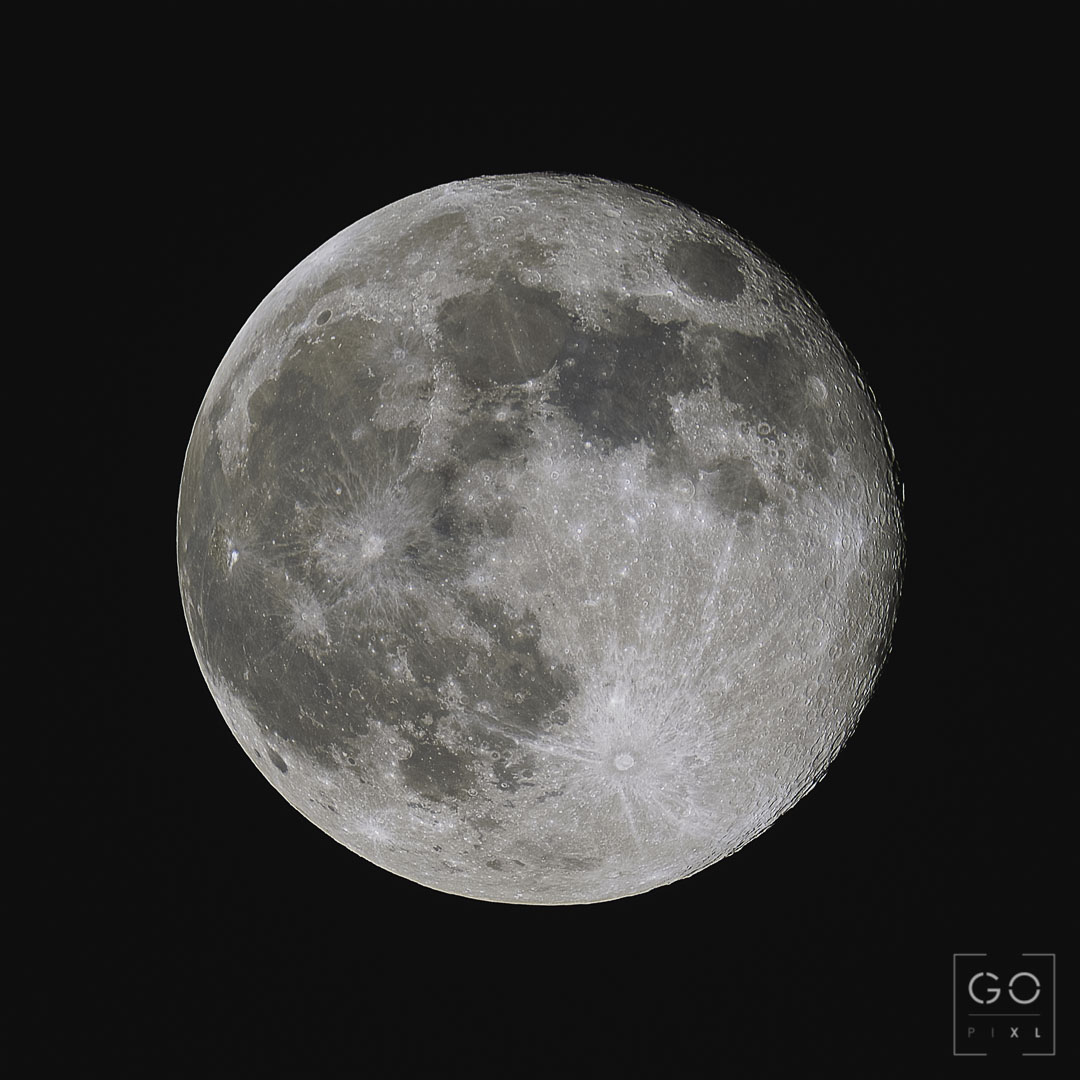
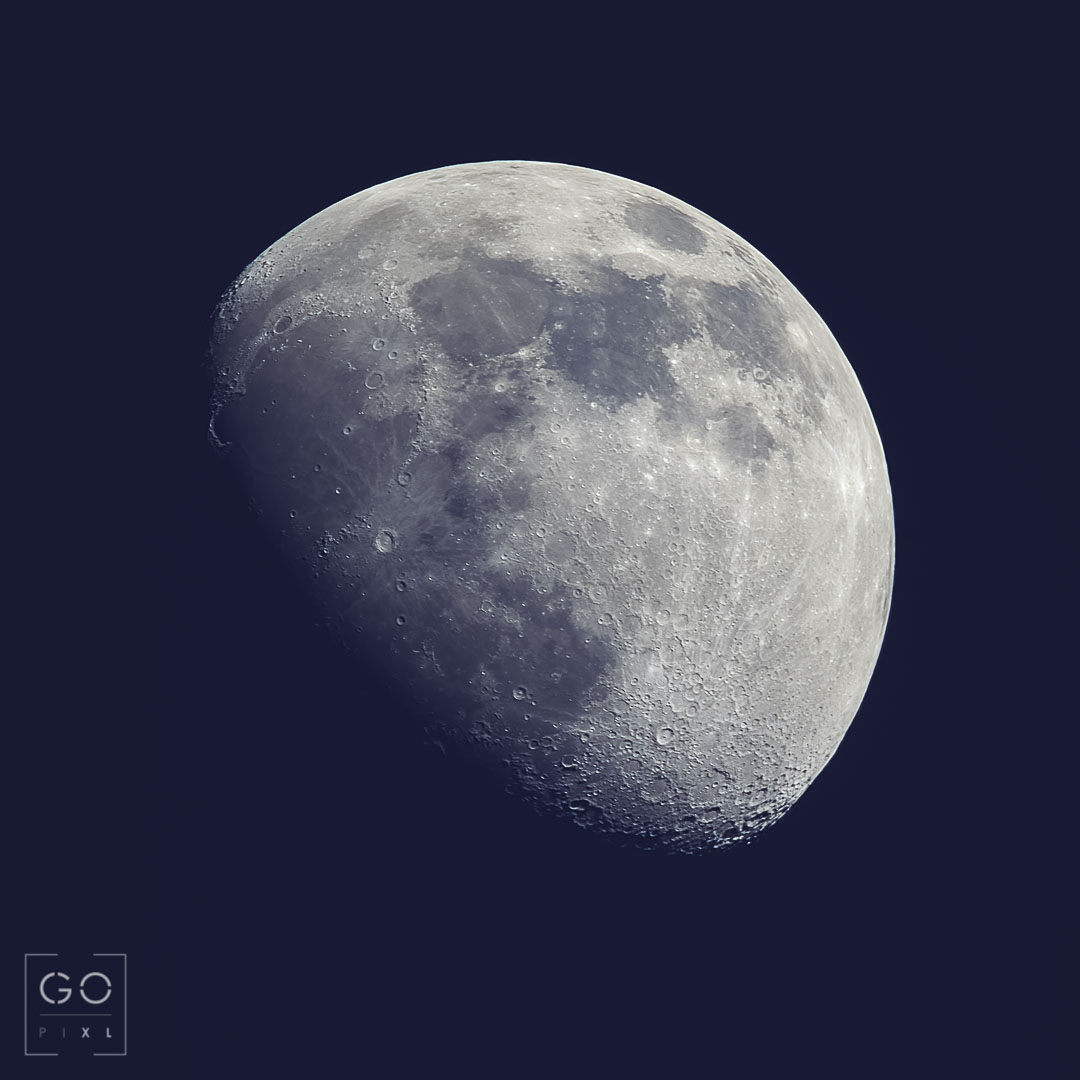
Then you can go really long with a big telephoto lens (if you have one) to get just the moon, fill the frame with it and get incredible details. The images below were shot with a 900mm lens from my balcony. The first 2 images are actual stacks of several frames. This helps reduce noise and get much more details from the surface of the Moon compared to a single shot. I use RegiStax and Autostakkert for that.

International Station Station Close-up
We talked about the ISS already, but we haven’t exhausted all types of images we can create about it. The ISS is roughly 400km above our heads and as crazy as it seems, you can get a detailed shot of the ISS if you have a big telephoto lens. You should be able to get some details of the station at focal lengths of 600mm and above.
It’s quite tricky to get however 😐 . As I said, it’s 400km away and only 108m long so being able to get some details is very tricky. I have a 600mm lens and 1.4x teleconverter. On an APS-C camera, that gives me an equivalent focal length of 1260mm! To get a successful shot, there are several things you need to do before the ISS shows up in your viewfinder.
As with other ISS shots, you need to know where it will be before it arrives so you know what/where to look for. You need to dial in your settings in advance. As it is moving fast and we have an extreme focal length, I suggest having a shutter speed faster than 1/1000sec and aperture as wide as possible. For my setup it’s only f/9.0, which means I need to increase the ISO significantly to get anything. After some experiments on stars, I settled for 1/1250sec, f/9.0, ISO 1200. You also need to use manual focus and set it to infinity in advance. I suggest focusing manually on a star or a distant bright object and lock it. If your lens has optical stabilisation, turn it on. It will help get a sharper image.
Once the ISS shows up, it can be a challenge to get it in the viewfinder. If you struggle, zoom out so it is easier to track, and then zoom back in while keeping it in the frame. Avoid touching the focus ring as you do so or it will ruin your shot. Once you have it in the frame, you can start shooting. Shoot as many frames as you can. It will increase your chances of getting a sharp shot but it will also help you pull amazing details out of those shots in post.
Having several sharp images and stacking them in post will greatly reduce the noise and help out sharpen the image further. I use the wavelet sharpening in RegiStax for that. It works really well on this type of images. In the end, this is what I got from my balcony when the ISS flew over in April 2020 (I composited some stars in the background for a better image).

Galaxies and other Deep Sky Objects
Right, on to the good stuff now: Deep Sky Astrophotography. What is that you ask? It’s the photography of distant galaxies, nebulae, planets or star clusters. I find this genre extremely exciting and even though it’s more difficult than anything we have discussed so far, it can be hugely rewarding.
To do so however, there is a piece of kit that is almost always necessary: a star tracker or an equatorial mount. It is basically something you mount your camera on which rotates in the same way the Earth rotates around its axis. It compensates for the movement of the Earth to keep the stars always in the same spot for your camera sensor. That allows for much longer exposures at greater focal lengths while keeping the stars sharp and avoid star trails.
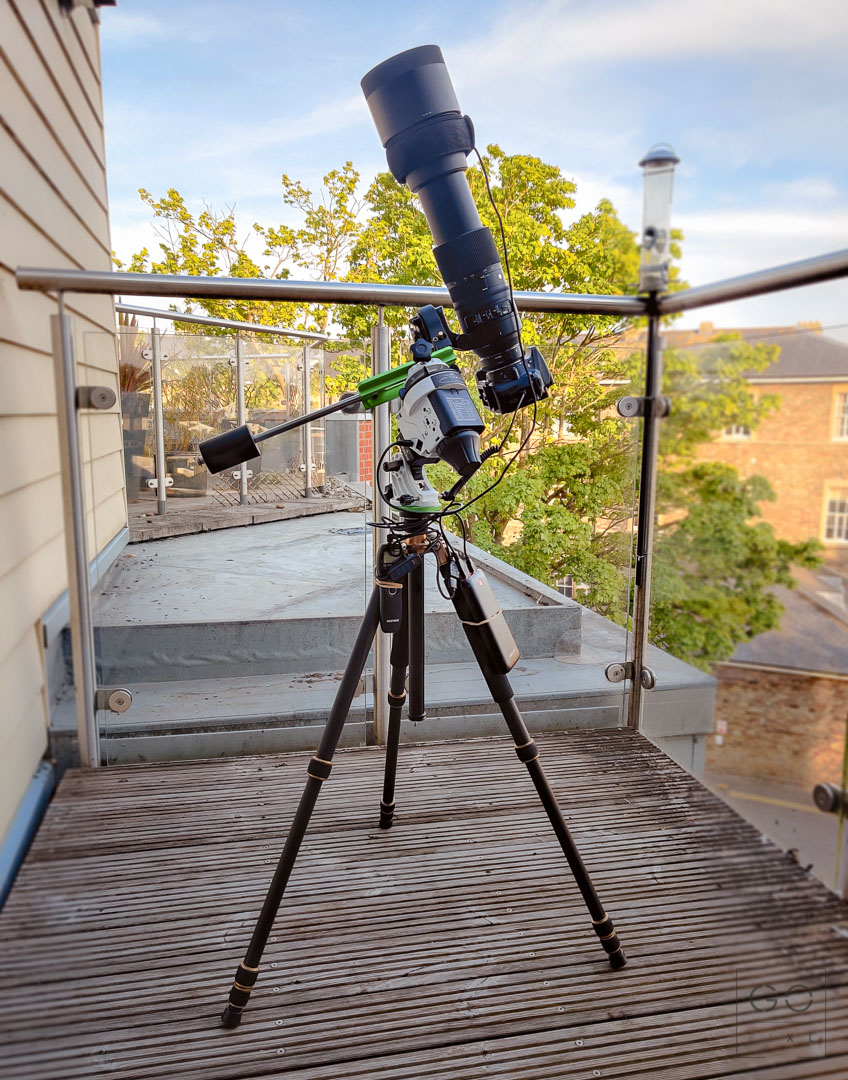
You can get a star tracker for as low as £150 (or even less second hand). I use a Sky-Watcher Star Adventurer Pro Pack that I bought for £279. Here is a picture of my Deep Sky imaging setup in its main configuration: Star tracker, Nikon D5300, Sigma 150-600mm f/5-6.3 DG, 1.4x teleconverter, intervalometer, dew heater band and power bank all mounted on a carbon fibre tripod.

With something like this, you can get sharp 30sec exposures at 900mm or even 1 or 2 minutes if your polar alignment is good enough. The process is more complicated though, and post-processing will take a long time. Since these objects are really far away (millions of light years away for some galaxies), you need to collect a lot of data to get a good image. I usually collects between 3 and 6 hours of data to get a good signal-to-noise ratio.
The Great Orion Nebula
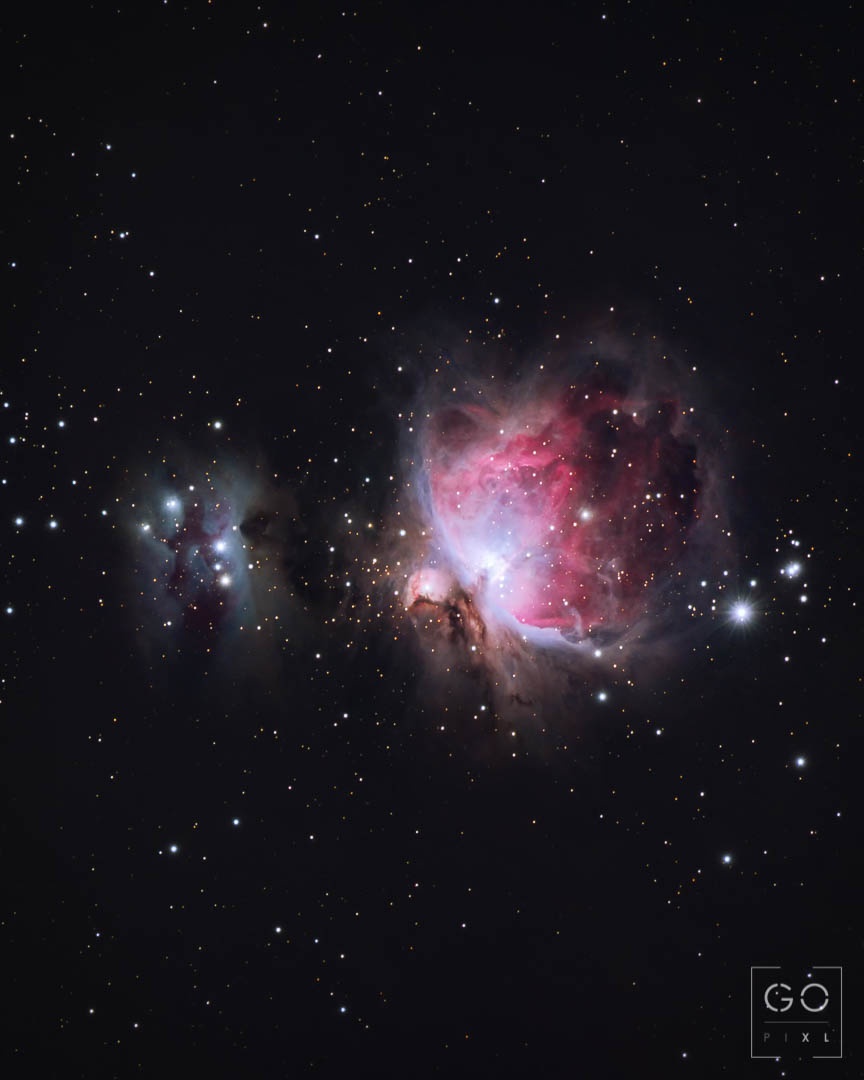
This is probably the most famous and most photographed deep sky object, and for very good reasons. It’s big and bright but also beautiful, making it a favourite for beginner and expert astrophotographers alike. The image down below was shot with nothing more than a 7 year old DSLR and a 70-200mm f/2.8 lens from my balcony in central Bristol during the 3rd lockdown in February 2021.
Venus & Pleiades Conjunction
In April 2020, I managed to image the conjunction between Venus (the brightest object in the image) and the open Star Cluster Pleiades. It only happens every 8 years so I was really pleased to get this from my balcony.

Bode’s Galaxy
Galaxies are also good Deep Sky targets in light polluted areas. Unlike emission nebulae, they work quite well in the city. The first target I would consider is our closest neighbour which is the Andromeda Galaxy.
The image below is Bode’s Galaxy and it’s neighbour the Cigar Galaxy which I shot across 2 nights in late April 2020 and collected 4.5 hours of data for. Considering they are 12 million light years away, I was really pleased with the results and it really goes to show you can get incredible images from the city.

The Pinwheel Galaxy
Also called M101, the Pinwheel Galaxy is another great target for Deep Sky Astro in the city. It is however fainter than all the other objects discussed before. That means it requires longer exposures and greater tracking accuracy. The image below needed 6.10 hours of total acquisition during 2 consecutive nights to get a decent image with enough details.

Conclusion
Even though I had shot astrophotography in the city before, the COVID-19 lock-down really opened my eyes to what is possible. I hope this post has opened your eyes too and that you might consider giving it a go in the future. Let me know if you do. I would really like to see what you have been shooting.
Even though some subjects cannot realistically be imaged in light-polluted areas, shooting from home comes with a lot of advantages I never thought about before.
Pros
- You can shoot literally from home! It’s so nice not to have to travel 1h out of town to start imaging. It means you can get the most out of clear skies and it also reduces the impact on the environment.
- Home is a really familiar place. Once you know what the night sky looks like where you live, you won’t waste precious time trying to figure out where to look or where Polaris is for example
- Levelling my tripod for Deep Sky Astro on my balcony is really easy. Just extend the tripod and that’s it! No need to fiddle with each leg to get the tripod levelled like I usually have to do on uneven grounds.
- You can do something else and leave your setup outside, imaging for the rest of the night. An entire night of imaging out in the field can be nice but it is usually cold and you get tired after a while.
- If you combine multiple nights of shooting, you can collect a lot more data, resulting in better images. That is hard to do if you have to drive out of the city every time you shoot.
Cons
- The obvious: light pollution. That means no Milky Way shots, no Hydrogen-alpha nebulae (unless you are using filters or a dedicated astronomy camera) and trying to deal with it in post.
- Temperature: City centres are usually a few degrees warmer than the countryside. While it is better for us humans, it tends to increase the sensor noise your image.
6 thoughts on “Astrophotography in the city”
Nice article. You might want to check your definition of primordial though… 😉
Thanks Steve.
Haha! 🙂 that was probably the literal translation from French to English that happened in my mind which didn’t go so well. I’ve updated the post.
Cheers
Fascinating article & some great images. Thanks for sharing
My pleasure Neil. 🙂 Nice to know it’s appreciated
Good article! I do astrophotograhy from Bristol city centre too, and it’s great to stretch the limits of what’s possible despite our light-polluted skies. I’ve made a website about this, which you may find interesting: http://urbanastrophotography.com/
Hi Lee!
That is great to discover other like-minded people from the same city! Love your work and great website! 👌🏻